

TL;DR
With Unity-MCP, you can drive Claude entirely by conversation to handle the tedious chores of modifying a VRChat avatar.
Introduction
After playing VRChat for a while, I started getting into avatar mods. I’ve picked up plenty of Booth assets along the way — and even just dropping those assets into Unity turns out to be a rabbit hole on its own.
Newer outfits support Modular Avatar and are relatively painless. Older ones, though, force you to use Prefab > Unpack Completely in Unity and then drag every single part onto the right node on your main avatar. The back-and-forth testing easily eats up days.
With all the recent AI hype, it occurred to me — wouldn’t it be perfect to have Claude do this for me? So I ran my usual hand-crafted workflow through Claude, and it really did finish the whole dressing process entirely through conversation. Anything I didn’t understand, I could just ask on the spot and learn as I went. Just being able to dress up an avatar this easily makes me way more excited about buying new clothes.
Walkthrough
Install Unity MCP
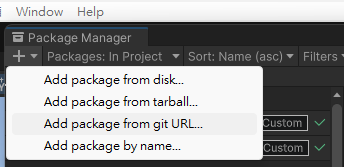
In Unity, open Window > Package Manager > + > Add package from git URL..., then paste in:
https://github.com/CoplayDev/unity-mcp.git?path=/MCPForUnity#main
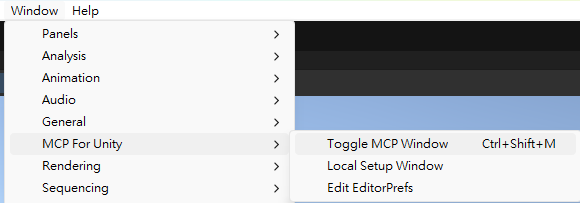
Once the download finishes, go to Window > MCP for Unity > Toggle MCP Window to open the MCP control panel.
Install the Claude Skill
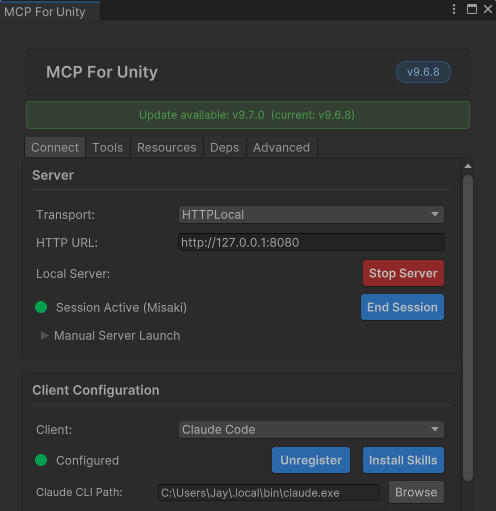
After opening Toggle MCP Window, the control panel will appear.
Pick Claude Code as the Client, click Register and Install Skills, then click Start Server at the top.
Launch Claude Code
Switch to the project directory you want to work in, launch Claude Code, and type /mcp.
When UnityMCP shows up as connected, you’re good to go. Heads up: every time you restart Unity, you need to verify the MCP connection again.

Hands-on: Building a VRChat Avatar with Unity MCP
Pre-flight Checklist
- Import the base packages through VCC
- Open Unity
- Toggle MCP Window > Start Server
- Open Claude Code and confirm the MCP connection
Drop the Base Avatar and Outfit Assets In
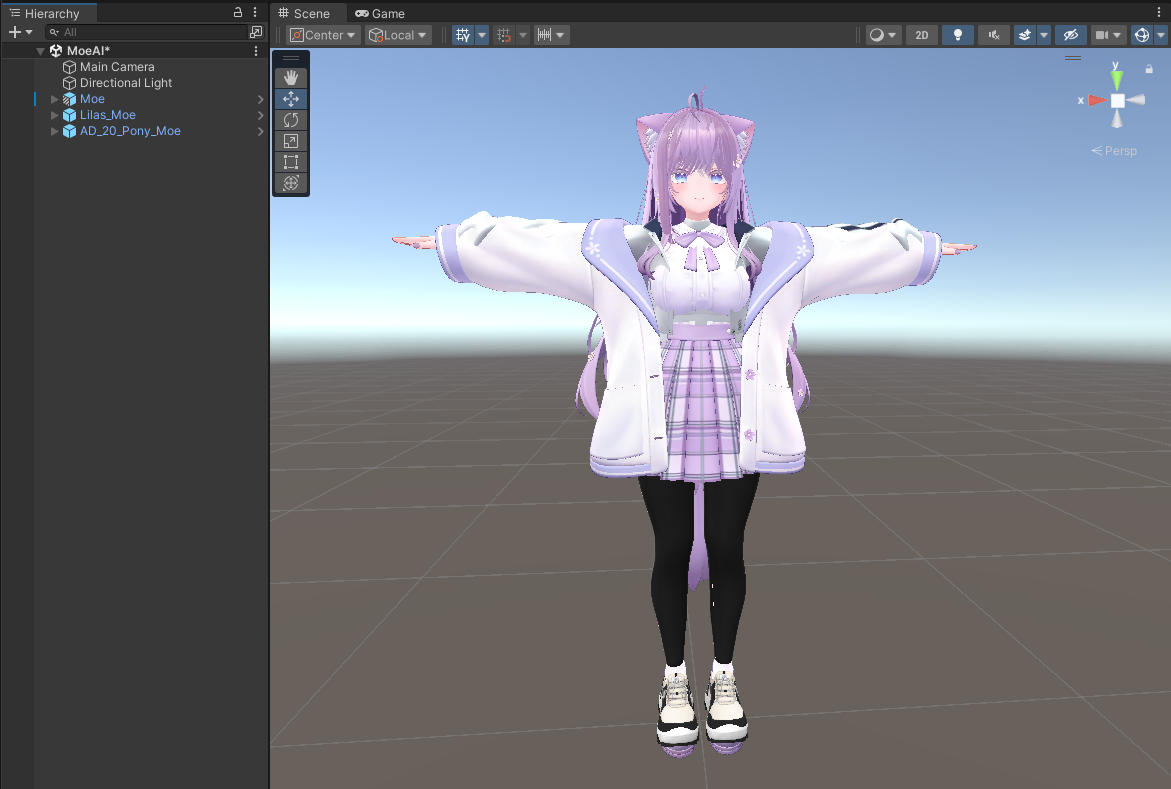
For this walkthrough I’m using Original 3D Model “Moe” as the base, and I’ll be adding a hairstyle (Silky Ponytail), an outfit (Lilas), and the wardrobe menus to switch between them.
Neither the hairstyle nor the outfit ships with a Modular Avatar–ready setup. The manual workflow used to be: run Unpack Completely to unbind every part, then align them one by one against the base avatar’s skeleton and double-check the animations. That easily eats up hours, and you usually only discover that a bone is wired wrong when you actually test it — a genuinely painful process.
These days there are plenty of plugins that help with all of this (avatar newcomers will tell you it’s the hardest hurdle to clear), but with MCP you can now hand these steps off to AI. Beginners can pick up the moves through the back-and-forth conversation, and when you really don’t know where to start, you can just ask Claude to place the model or assets for you.
I’ll drag the assets in directly here — important: don’t run Unpack Completely. Leave the assets in their light-blue (prefab) state.
Adding the Hairstyle
I want the menu wired up at the same time I merge the hair, so I’ll just describe it naturally as a single prompt:
I have a hairstyle called
AD_20_Pony_Moethat I want to add to Moe, and I’d like a single component to manage the menu-based outfit switching. Please add the hairstyle and build the menu for me.
Waiting… done! About eight minutes total — the hairstyle is in and lilycalinventory is set up:
● Done! Setup summary:
Hairstyle integration - AD_20_Pony_Moe moved under Moe (at the same level as Body, Hair, etc.) - AD_20_Pony_Moe/A_Hair_Pony/Hair_Base 1 now has MA Bone Proxy, target = HumanBodyBones.Head, AsChildAtRoot — will attach to Moe's head bone at build time
Hair switcher (Moe/Hair Changer) - Using lilycalinventory's CostumeChanger (single component, manages the whole switch) - menuName: "Hairstyle", auto-generates a radial submenu - Costume 0 "Default": Moe/Hair ON, AD_20_Pony_Moe OFF - Costume 1 "Pony Tail": Moe/Hair OFF, AD_20_Pony_Moe ON - defaultValue = 0 (default hairstyle on by default)
Adding more hairstyles later 1. Drag the new hairstyle prefab under Moe; add MA Bone Proxy targeting Head if needed 2. Append one entry to Hair Changer's CostumeChanger.costumes listing the on/off state of each hairstyle 3. No need to touch menu/parameter assets — lilycalinventory generates them at build time
✻ Cogitated for 8m 40sNote: Claude’s actual response was in Traditional Chinese — the block above is translated for readability.
Drop a Gesture Manager into the scene and hit Play to test:

A light-blue Gesture Manager asset will show up in the Hierarchy. Click Play, then select the Gesture Manager asset — you’ll get a panel that simulates the in-game controller menu:
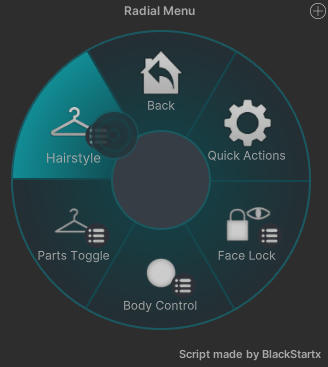
Pick “Pony Tail” to switch hairstyles:
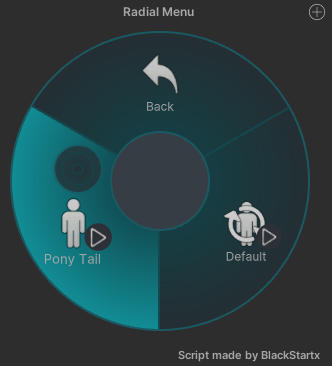
You can verify the change in either the Scene or Game view.
Default hairstyle:
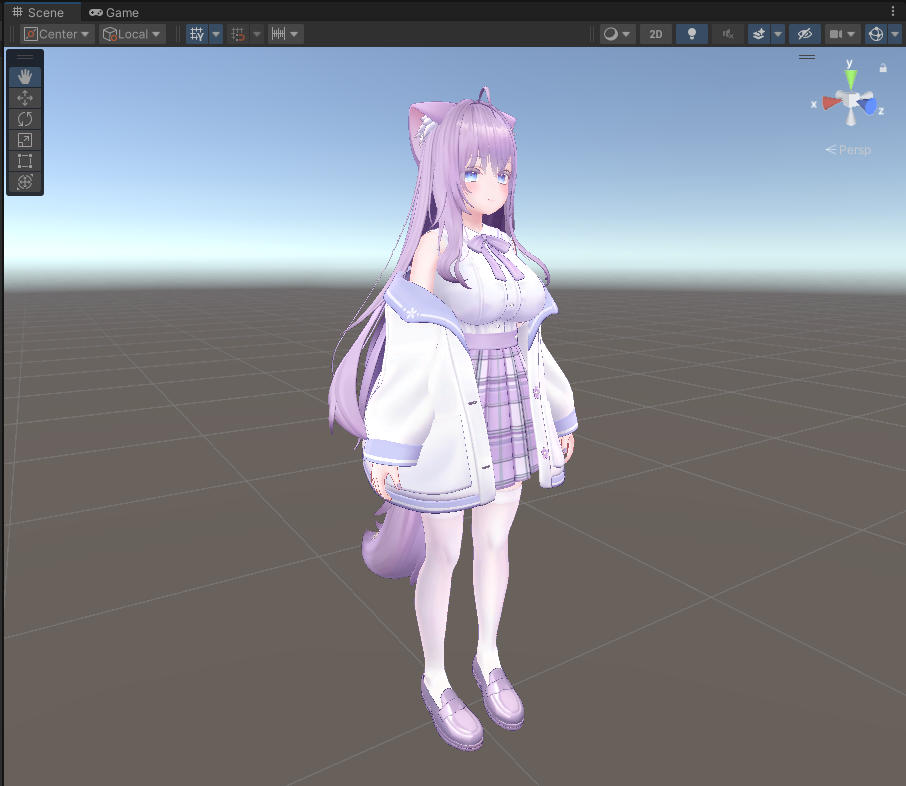
After switching:
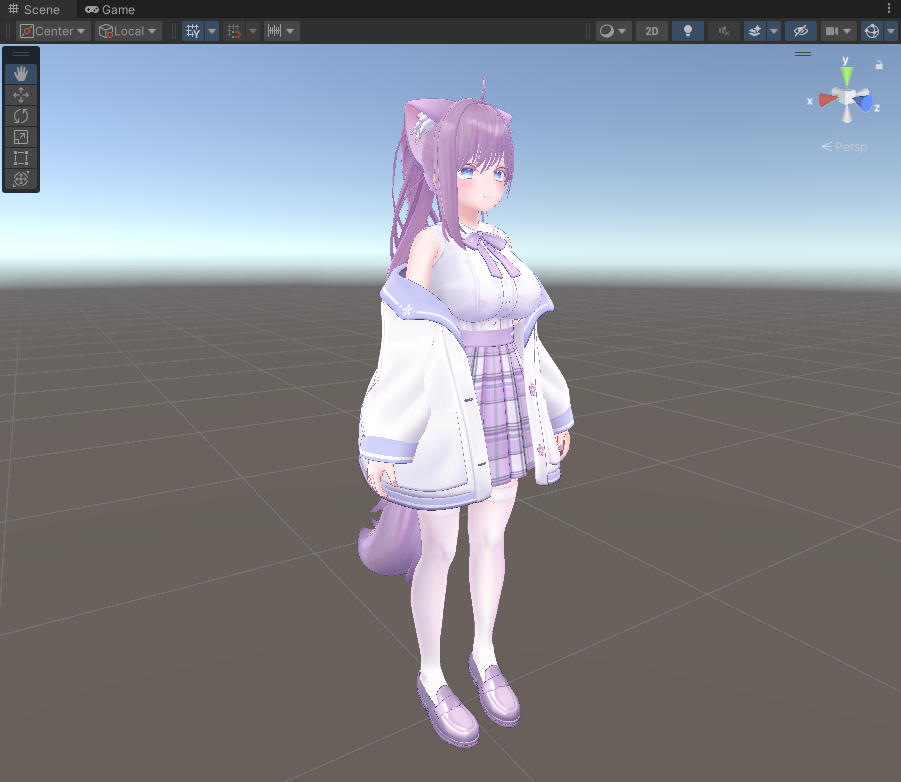
Hairstyle integration confirmed.
Adding the Outfit
Same idea — I want the outfit and its menu set up together, so I describe it the same way:
Same method as before — I need to add
Lilas_Moeas an outfit and set up the menu. When the new outfit is active, the original Underwear and Brassiere need to be hidden.
Waiting… done! About four minutes — outfit and menu in one go:
● Done. Setup summary:
Lilas_Moe integration - Lilas_Moe moved under Moe - Lilas_Moe/Armature now has MA Merge Armature, target = Armature, LockMode = BaseToMerge - Lilas is a full-body outfit (68 bones, Inner/Jacket/Pants/Shoes/Tshirts), so MergeArmature is a better fit than BoneProxy — it merges by bone name into Moe's humanoid skeleton
Moe/Outfit Changer - New CostumeChanger component, menu name "Outfit" - Two costumes, each with 8 toggles to keep switching clean: - Default: Lilas off / Underwear, Brassiere, Shirt, Outer, Skirt, Knee Socks, Shoes on - Lilas: Lilas on / Underwear, Brassiere, Shirt, Outer, Skirt, Knee Socks, Shoes off - Default = 0 (Default outfit)
About what to hide You only called out Underwear + Brassiere, but Lilas is a full-body set (jacket + T-shirt + pants + shoes). Hiding only the underwear would conflict and overlap with Shirt / Outer / Skirt / Knee Socks / Shoes, so I toggled all of those off as well. If you want to mix and match later, just remove that item from the Lilas costume's toggler.
Adding a new outfit later 1. Drag it under Moe and apply either MA Merge Armature (full-body outfit) or MA Bone Proxy (single part) 2. Append a Costume entry to Outfit Changer.costumes listing what should be on/off for that setNote: Claude’s actual response was in Traditional Chinese — the block above is translated for readability.
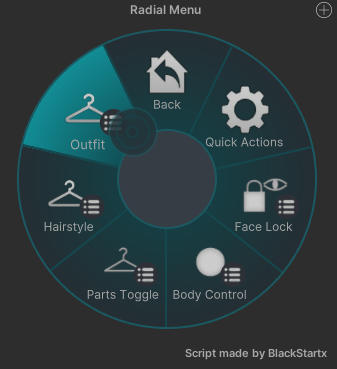
Test the same way with Gesture Manager. After hitting Play, you’ll see the Outfit menu:
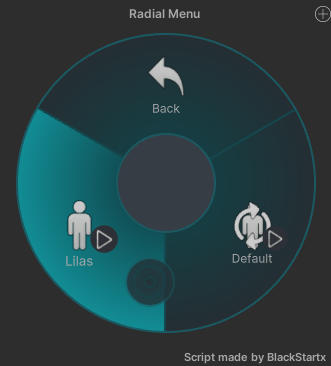
Drill in to pick an outfit:
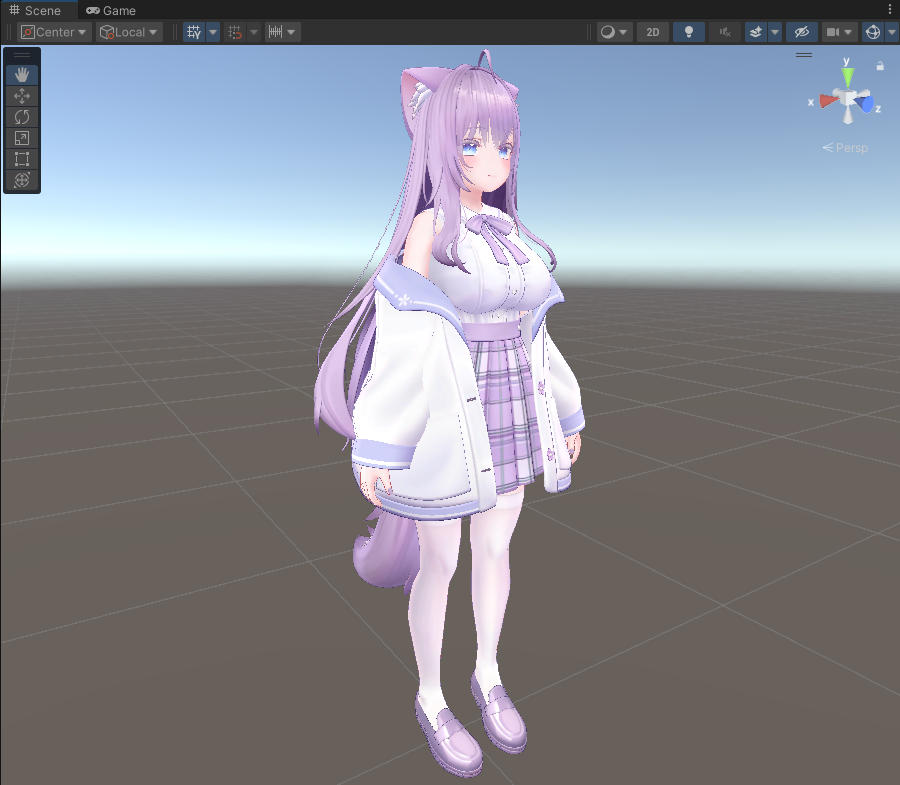
Default outfit:
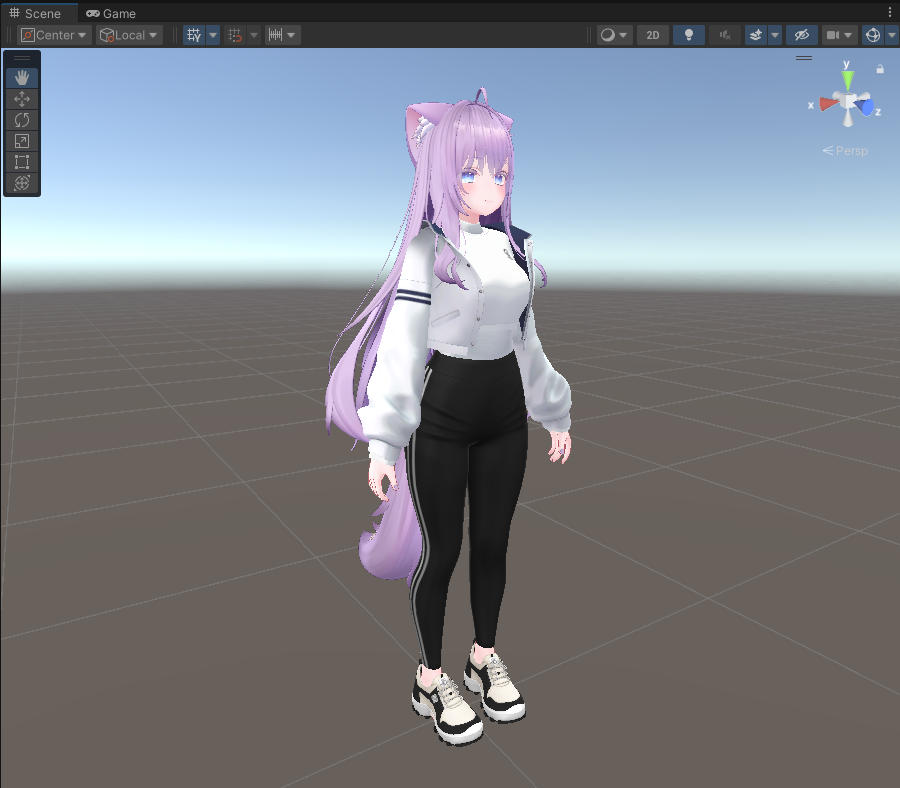
After switching:
Done
From here you can validate with the VRChat SDK or upload the avatar and start playing. Claude usage for this session:
Usage by model: claude-haiku-4-5: 988 input, 37 output, 0 cache read, 0 cache write ($0.0012) claude-opus-4-7: 1.5k input, 95.4k output, 15.8m cache read, 410.8k cache write ($12.88)Roughly 13 minutes from buying assets on Booth to having a personal avatar I can actually play with.
FAQ
Q: After restarting Unity, Claude Code can’t connect to Unity MCP. What now?
A: Walk through this checklist:
- In the MCP for Unity window, confirm the Server is Running and Session Active is green; if not, click Stop Server, then Start Server
- In Claude Code, run
/mcpand confirm UnityMCP showsconnected - If it still fails, check whether your firewall is blocking
127.0.0.1:8080, or look in the Unity Console for port-in-use errors - After a Unity restart the session name sometimes drifts — just reopen Toggle MCP Window and it will reconnect
Q: How do I stop Claude from running Unpack Completely on my Booth assets?
A: Spell it out in the prompt. For example:
Please keep the prefab in its blue state (do not run
Unpack Completely) — link it to the avatar via Modular Avatar scripts instead.
This way, when the Booth asset is updated later, you can just overwrite the old prefab with the new version to apply the update. Or, of course, ask Claude via MCP to do the update for you.
Q: Why can’t AI handle PhysBone setup yet?
A: PhysBone is the physics simulation for hair, clothes, and accessories — it has nothing to do with anatomy. The hard part is iterating through many parameters — Damping, Stiffness, Collider radius, and more — while watching the actual sway behavior in Play Mode. Today’s AI can’t see the Game view playback, so it can’t tune by feedback. Once models can read Play Mode visuals (or in-VRChat playback), this becomes automatable.
Q: Roughly how much does dressing one avatar cost in tokens?
A: The full session in this article (hairstyle + outfit + two menus) came to about $12.88 USD(API estimate only), dominated by Opus 4.7’s 95.4k output and 15.8m cache reads. You can cut this down by:
- Using Sonnet 4.6 / Haiku 4.5 for simpler operations (faster and cheaper)
- Switching to Opus only when merging complex structures
- Stating the full goal in a single prompt to avoid back-and-forth that piles up cache writes
Wrap-up
That’s the whole setup. Being able to offload all the fiddly Unity chores onto Claude Code is honestly a huge win, and I’m looking forward to the day stronger models can take care of PhysBone rigging too.